Tuesday, March 27, 2018

Place mats again?

  I finished off a couple more of the smaller place mats over the weekend.  It was just too cold to go anywhere, or do anything else.  So I pinned and stitched a few things. 
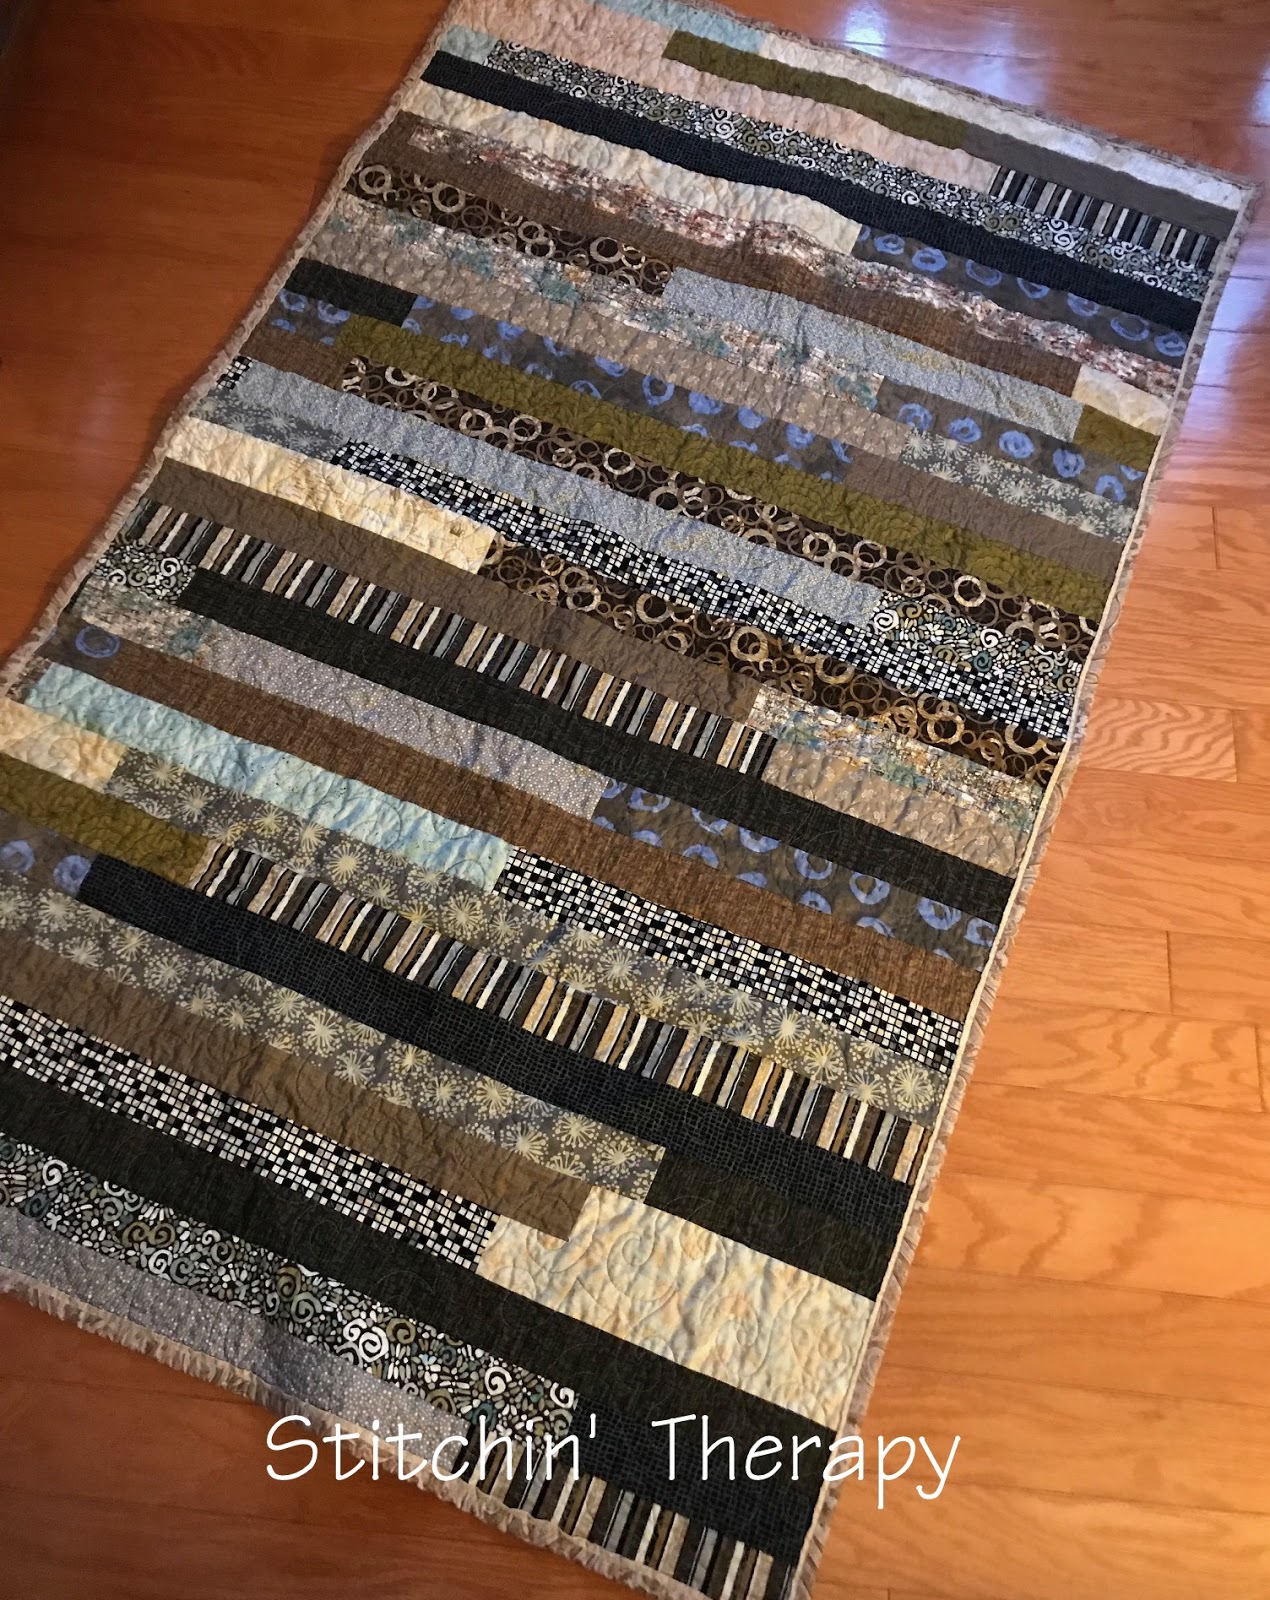
   I had some leftover cuts of the fusible interfacing that were just big enough for a 8 by 5 grid for the watercolor.  That created a mat about 8'' by 12''---just a bit small, so I added a 2 '' strip of batik for an outer border.    No binding on this one either, just a simple pillowcase style edge.

   When I am not using binding on these small projects, I finally figured out how to get a better edge on them.  Usually, you need to leave a 3 to 5 inch opening for turning.  And no matter how I tried, my turning opening would gap/not lay flat/ never look just right.  There had to be a better way.

  I know I have talked about this, but for the life of me I can't find the older post, so I will just share the words for now. 

   I cut the backing fabric larger than needed, so I can cut it into 2 sections.    Then I turn around and sew them back together---leaving a 3'' opening un-sewn.  That is the opening for turning.  

  Then I can assemble the project placing  the top and backing with right sides together and the batting on top.  The batting is cut a tiny bit over the exact size needed.   (So the batting is smaller than the fabric being sewn.  I actually catch the smallest bit of batting in the seam, which holds it in place).  I sew all 4 sides....completely.  Turn it right side out thru the opening in the back and press.
  The opening is then hand stitched closed.  Projects just need a few lines of quilting to keep it in shape.  I usually stitch around the outer edge about 3/8'' from the edge first.    Quilt!  As much or as little as you like. 

  As a note for those asking for patterns......I don't have patterns for sale.  I have done up a couple of design guides for value placement.  These are found at the bottom of  the Patterns page ----look under the banner photo for it.
   I also do not have kits for sale.  But......here is a source for them.  Go to WHIMS .  They are a company with kits, pattern notions, and some watercolor fabrics.
Happy stitching.

Sunday, March 25, 2018

One down, one to go

  I actually got more accomplished this past week than I expected.  Sir Old Man did very good with the cataract surgery ....and he is a much better patient than I expected him to be. LOL.....luckily the "put in eye drops schedule" is much simpler now than a few years ago, I heard.  So I managed to quilt up the strippy quilt that had been waiting it's turn under the needle.


  A partial jelly roll was gifted to me, and I added about a dozen fabrics from my stash to put this together.  Mostly browns, black print, a bit of blue and cream create a cozy, stay at home feeling. 


  For the binding I found a brown paisley in the stash and was just short of enough  fabric to completely bind.  So I decided to make a flange binding.  That allowed me to make narrower cuts of the paisley, add a neutral strip for the flange  to make it all work.   I like the finished look. 

I used the tutorial found at Missouri Star for the binding.


  And one to go is the Boxed Squares of floral fabrics.   I originally planned to use straight line quilting making diagonal X's thru the boxes, but now I am having other thoughts.

  The pattern is hard, straight lines, and maybe I need to use a curved quilting to soften the look.  Not much  of any motif will show against the busy fabric, so a general meandering would work. 


 I had questions this week about my fabrics, so here are a couple of close ups of the floral fabrics I use all the time.    These should give you an idea of what to look for when searching for fabrics.  You can't just buy a pre-cut package of a fabric line and get all usable floral fabrics.  In a pre-cut pack, you might get one or two.  So I rarely buy pre-cuts.   Fat quarters are the best size for accumulating a floral collection, I think. 

  And once again,  No Reply commenters.....please include your email if you want an answer to questions.   There are many tutorials to explain how to link your email to your google identity. 
Happy stitching. 

Monday, March 19, 2018

Time to build a log cabin

  We made a trip to the local used book store over the weekend.  I picked up a book, A Log Cabin Notebook, by Mary Ellen Hopkins.  She was one of the first and best quilters to break things down into simple steps.    I have several of her books, but not this one!  So for $3 I was happy.
   We all know you could spend a lifetime making log cabin quilts and never have two the same.   With this book you have a lot of inspiration.  It  has a good tutorial on log cabin blocks... from traditional methods to chain piecing, lots of layouts and design ideas.

  When I did the post on lesson from a log cabin variation,  I showed several quilts using the quarter log cabin block.  Mary Ellen calls it a "chevron log cabin" block in her book.    So call it whatever you prefer,  it is a block I really like.


  I shared the "recipe" I am using to make this block a week ago in this post using 2'' strips.  If you prefer to use 2 1/2'' strips, feel free to adjust the size and measurements.   I have some strips cut and  will be officially starting this project next week.  I am using floral fabrics, and have heard from one who plans on using scraps, another who wants to use up theme fabrics.  Join us if you like, as it could be interesting to see the different looks.


  All those floral fabrics in Boxed Squares.....it is very busy and fun!  And finally all sewn together and ready for quilting.  I will probably use straight line quilting on this one.....nothing else will even show up.  So this is my main task this week.

  Second big task this week is attending to Sir Old Man, who is having cataract surgery on his right eye.  The left one will follow in a few weeks.  We think we have the schedule figured out....like drops in the morning, drops at night, do this, but not that.   He is so use to being in control that the thought of this is driving him a little bit crazy.   Wish me luck:)
Happy stitching. 


Wednesday, March 14, 2018

Once again...time changes

  
   I caught a couple of hours  or so I thought, in the sewing room yesterday.  I got up to stretch after sewing a few rows, checked the clock and thought  I can sew another hour.  Then I went to the kitchen for a drink, and looked at that clock....what, it was time to start dinner! The time change gremlin got me again! 

   We deliberately did not discuss the time change, nor were any clocks changed until Sunday morning.  Much less stress that way, I thought.   All clocks were changed....except the one in the sewing room.  So now I feel my whole week is just "off" .    Once again!

  But all the Boxed Square blocks are joined...so far.  Just one more row to add and I will call it done.


 Just to give you a tease.....I made a few of the Log Cabin blocks to test my measurements for the planned next project.    They went together quickly and now it will be cutting and planning layouts for starting these.
   I heard from Linda  and she jumped in and has a set of 4 done already.    So glad she is working on these too.

  For anyone else who plans on sewing along....remember the whole point to this layout is to blend values and get a trellis or sashing effect from the darkest value.


   I have some large squares and strips cut.  This is how I am laying them out.  They are in the position they will be sewn in.  I can squint a little bit and see if the blending is working before I sew.   If one strips is too light or dark in a position, I can shuffle thru the stack and find one I like better. 
   Once I am satisfied with the group, I am clipping them together  until they are sewn.


 For good measure I did a couple more garlic knot blocks..... I am working them in as leader and enders.

   These are quite addictive too.  I am enjoying playing with the colors and matching them up for different combos.

    Happy stitching.


Saturday, March 10, 2018

Log Cabin block "recipe"

  Before I start a block,  I need a  guide to help me keep things straight.   Just like when I cook or bake, I need a recipe.

    I labeled this quarter log cabin block  with the sizes needed using 2'' strips.  The notation of light to medium to dark refers to the value of the strip to use in that placement.    This block will finish up at 7 1/2''.
And of course you could add another round of logs to this and make the block larger.  But since I plan on setting this on point, the 7 1/2'' block is large enough.

For each block  Cut:
3 1/2'' square ---- lightest floral
1 @  2'' x 3 1/2'' --- light floral
1 @  2'' x 5''--- light floral
1 @  2'' x 5'' --- medium floral
1 @  2'' x 6 1/2'' --- medium  floral
1 @  2'' x 6 1/2'' ---- dark medium to dark  floral
1 @  2'' x 8''  ---- dark floral

   This is an early "Heads Up'' for a couple of other readers who have asked for instructions to sew along.    Linda from Art in Search and I had a plan to work on this block together.  She is still recovering from surgery, so her pace has slowed down like mine. 
  So for other readers who are in a hurry, I put together this "recipe" for cutting.  You might prefer to use scraps, batiks, or selected colors rather than the floral fabrics I will use.  I can't actually predict how other fabric prints will turn out.....but that could be a fun surprise.   
   I will repeat the cutting list, which is the correct sewing order too, when we get ready to begin in about 2 weeks.  For now, I plan on making some cuts for testing.

  I have one quilt pinned and one to go...and of course I need to get the two quilted-----that is why the 2 week delay.  At least that is my plan for now.
Happy stitching. 

Wednesday, March 7, 2018

Fabric Selection

   I had several questions in emails this week about fabric selection and where do I get my fabrics.   I buy fabrics everywhere.....remember I have been collecting these fabrics for a very long time.  But excellent fabrics are out there.  I do not purchase a full fabric line, rather I go for the ones that will work for these designs.    And I love to pick up older fabrics at estate sales or such. 
   As for fabric selection, these is a lot of info buried in my older  posts.  So I dug out a class handout that I have used to illustrate fabric selection for watercolor designs.


Water Color Class Fabric Selection

Here are examples of fabrics in my stash that I use. This first photo is arranged by value.


  This selection are light fabrics. Note the light background and pale print. The last two on the right have deep/stronger prints. They are considered light mediums.


Your fabrics should include several colors and value in its pattern. Light areas and dark areas merge and blend when viewed next to each other and from a distance.

  
 Not all the fabrics I use 
are floral patterns.  
The top row of fabrics in this photo are good choices. They are 3 types of paisley prints.  Note the curved lines of the pattern.


 The bottom row are fabrics to AVOID, These are tone-on-tone prints, small calico prints and 2 color prints. They will read as solid, or dots.
  Now hit the stash and see what you can find!  Remember you only need a few 2'' squares of each fabric, so scraps are a great source.


Saturday, March 3, 2018

Lesson from a log cabin variation


   I have had this project in mind and on my to do list for a while.  This was seen at a quilt show in 2014----all floral fabrics and of course it called to me.

  I ran across several very similar designs on Pinterest over the last couple of years too.  So I finally sat down to figure out the pattern.  LOL......who knew?  It is a log cabin variation.  And I have done this several times with different value placement.


  Look familiar?   A log cabin block called quarter log cabin, or off-set log cabin.   It is the block that became the Faux Braid.  The divided placement of value--light on one side, and dark on the opposite-- was done by Sharon at Vrooman's Quilts and I had to make one.   This links to her tutorial using jelly roll strips. 


  I made not one, not two, but at least three quilts with this block.  And each one looks different.


 Done all in batiks.


   Done in floral fabrics.
  Actually, I did two in florals....one to keep and this one was donated to an auction.   This one used 2 1/2'' strips.


   Again, the same block using 2'' floral strips in a barn raising layout design.  For this one  I had to adjust the cutting measurements due to the size of strip I was using.


  This is a close up of the block in the inspiration quilt.
 Differences to note:
  • First, the starting square is over-sized for the strips. 
  • Second, the design is arranged on-point.  
  • Third, the value placement radiates from lightest in the starting square to darkest to the last logs added. 
  • The dark logs form a trellis design with a 3-D effect against the light areas.  


  My next step was to go to EQ7 and find a block to draft and color.  Then I can make a test block to measure.  (Imagine this block rotated to look like the above inspiration block.)
  I will actually print out a plain block and mark it up with values and measurement.


   A note on the starting square that is over-sized.  My logs will be 2'' strips, so they will finish at 1 1/2'' in the block.   I want the starting large square to be twice that size.  So for the square to finish in the block at 3'', I will begin with a cut square of 3 1/2''.   If my logs were narrower, I would still double the size for the starting square.

  Insight:   Lesson learned once again......from a basic, classic, simple block many design variations can be created.  

  •   The size of the logs can vary and alter the finished design.
  •   The arrangement/placement of value can change the appearance of the       block.  
  •   The setting placement changes it all.  
   I am not re-inventing the wheel, just breaking it down into simple parts.  The design process is difficult for some quilters and I get many emails about how I figure things out.  So this seemed like a great block to give some insight to my thought process.    
  My next step is to do some math, cut some fabric, and try a test block. It's the only way to  be sure it is what I want.  But for now, I have more rows to join on those boxed squares and backing pieces to join......good rainy day sewing.
Happy stitching.  

Thursday, March 1, 2018

A new tray

  I plan on piecing a few blocks today as I assemble more rows of the Boxed Squares.     Like the new work tray?  It's a nice size......
  Ok, it is not a work tray....much too beautiful for that.


  It's a new serving tray from Woodworking 101 class that Sir Old Man took recently.   Not that he needs a beginning class, but he wanted to learn the technique of choosing different woods and grains to create projects like this.
   Three woods were used.....walnut, cherry,  and maple.  To enrich the color he "fumed" the tray  with ammonia at the glue up stage. 


   On the back, I have him sign  with his branding iron that he got for Christmas a couple of years ago.


  Overall size is 11'' by 20''.  It has a very narrow edge band on the two long sides, and the lovely curved handles create the lip on the short sides. 
    I love having a tray like this for carrying things to the porch....much safer for me to hold onto.

  I think I should ask for a smaller version to use by my sewing machine to corral some much used tools.  Can't let him think one tray will be enough:) 
Happy stitching. 


Related Posts Plugin for WordPress, Blogger...